
Winter 2013

SO what have I been up during
this long, long, cold winter?
Doing a much needed studio makeover!!
 |
| Before Makeover - What a mess! |
As you can see from the collage photo on the right my studio was a big mess. I was spending more time looking for supplies and most times not finding what I needed. Bags, boxes and booth supplies lined the floor; I ran
out of places to put things.
I couldn't
create anymore because I wasn't able to locate what I needed to work with. The lack of storage, huge
messes and the color of the walls in my studio (slate blue) was so depressing
that is was overwhelming me, I had to make some changes.
Being snowed in for weeks was the
perfect opportunity I needed to make the transformation.
I schemed and planned on how I could make changes without
spending a lot of money. I spent hours
on Pinterest looking at studio designs and getting ideas on how I could make my small space
more workable.
I choose bright colors of lime green, teal and purple to paint the walls, these are my favorite
“HAPPY” colors.
 |
| Bay Window with New Valance - A Pinterest Idea |
Things were starting to come together and I figured it would take me about 4 weeks to accomplish it all.
I had everything all tore up, my boxed studio supplies were occupying space in the hallway, guest bedroom and living room, what I mess I had.
I had two walls painted when I got sick. Put me out of commission for two weeks and blew my 4 week makeover timeline all to you know what.
 |
| My Closet Office |
Anyhow, it seemed to take me forever to get the painting, arranging and mass purging accomplished but I did it. All in all it took me two months to accomplish instead of the 4 weeks I had planned.
It was well worth all
the time and hard work it took because I now have a studio that I LOVE!
The drawers and storage bins are labeled, my files organized, tools have new homes, my assortment of pliers hang on the wall inches away from my work desk, everything has a place (well almost, I’m not perfect you know) and the layout works.
I have created an uplifting, inspiring work atmosphere where
I can create and explore my world of jewelry designs.
Now if
I can just keep it this way, so far so good!
Check out the photos below to see my new studio!
 Between my office closet and my workbench I moved out the old file cabinet and put one of my bookcase sideways. This formed a wall and defined my office space and gave me much needed space for my books and files. I painted the end of the bookcase with black chalk board paint and added white trim to resemble a screen door. ( a Pinterest idea) The back side of the bookcase needed help so I cut sheet metal and nailed it in place and now it provides a safe place to solder and also allows me to hang things from magnets.
 |
| Tool Bench Before and After |
The before/after split photo here allows you to see the changes I made to the workbench. Ken built the bench top and peg board area for me a few years back and included a row of narrow hidden shelves along the right side of the peg board allowing me to store my chemicals out of site. The big problem I had with this bench was clutter and lack of organization. The newly revamped bench now stores oodles and oodles of my jewelry supplies and I can quickly located what I need now that they are labeled ! The second drawer from the top when opened becomes my design tabletop space.

I use to have 3 bookcases centered on this wall. By removing one of them I was able to move my kilns to this side of the room. All of my beads are now in one place! Even better, I color co-ordinate the stacking plastic boxes and used paint swatches to make punched out butterfly's that I glued on the boxes that corresponds to the color of beads inside.

Look at that bright purple wall! I love this color! Only one wall is painted purple, and I have plans to do add some lime green to it when I have more time.
Painting the ceiling fan turquoise was a lot easier than I thought and I love how it came out. I just love the pop of color and this room just makes me smile the minute I walk in to it!
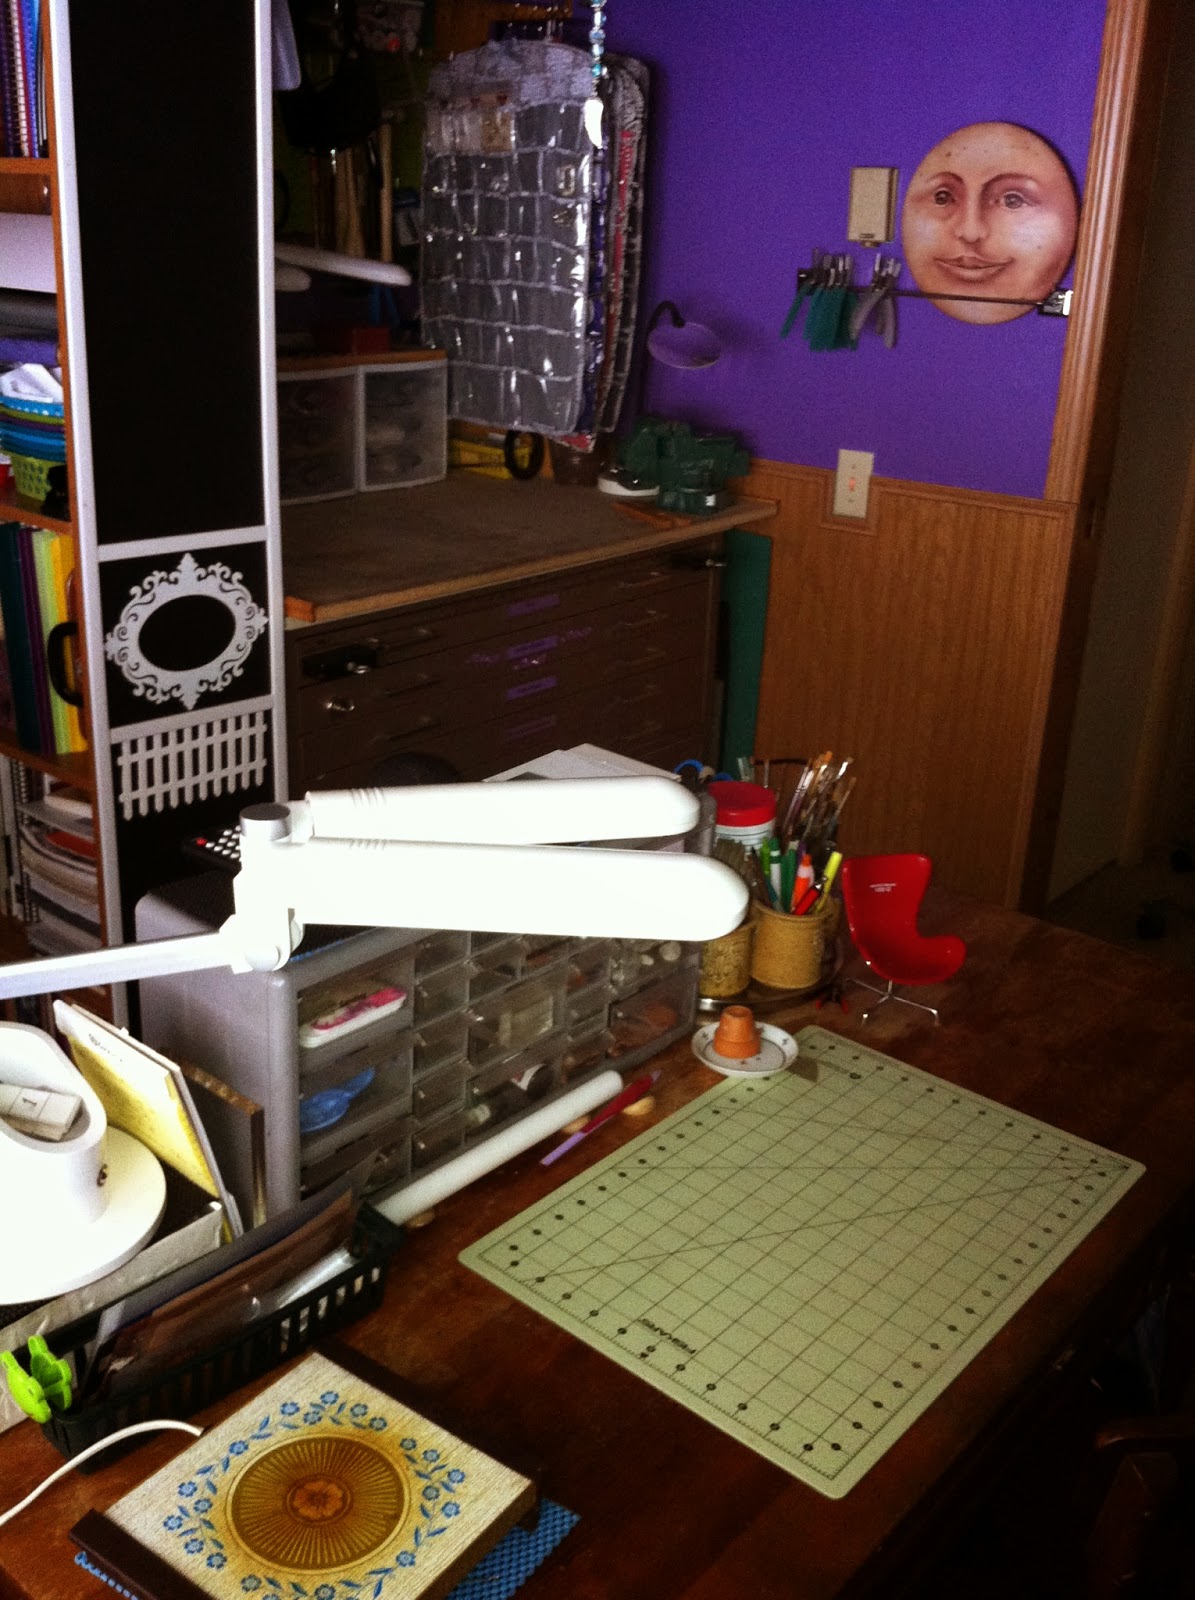 I should of taken a better photo of the one place I spend most of my time at designing jewelry. My antique work desk now sets in the middle of the room instead of in front of my window with my back to the world. I wasn't sure I'd like it out in the middle, especially since my room is so small but it couldn't be in a better place. I can see out the bay window, see down the hall way and watch TV if I want, all without moving. All of my supply's are right behind me and it works so well. I even made "curtains" to go around the bottom of the desk in purple (of coarse) to covers up my jewelry cases and wastebasket. It brings the color down to the floor and conceals the clutter.
I'm so excited to see all the plans I'd worked on for my studio turn out to be the fun work room I needed for creating
my one of kind creations!!!
my one of kind creations!!!


